

Hello again everyone!
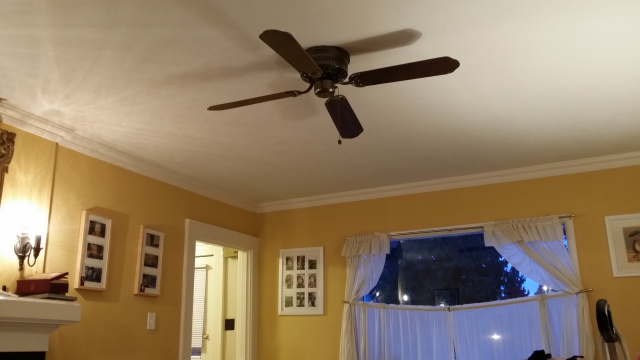
I was inspired the other day sitting in my living room. I was on the couch and I looked up at my 20 something year old ceiling fan and thought to myself, "How can I liven this thing up?" Well, I have come up with a solution! I have got a how-to for you to try and together we are going to paint some ceiling fan blades and liven this ceiling fan up a bit. So, let's go!
First things first we are going to have to make sure the power is off. My fan is powered by a wall switch and a pull chain at the fan. With the wall switch in the on position I grasp and pull the chain and pull until the fan is turned off. Ceiling fans usually have 4 settings; low/medium/high/off. Once you have the fan in the off position at the fan, go back to the wall switch and turn that to the off position as well. This step will help make certain no children come in and turn the fan "on" while you are removing the fan blades.
Next we are going to remove the blades and the brackets that are attached to them from the ceiling mounted fan. The brackets are attached to my ceiling fan by a simple phillips head screw. I've got a power drill in hand and slowly remove one blade at a time.
Once all the blades are removed from the ceiling fan, remove the brackets that are attached to the blades. I used the power drill to speed up this process.
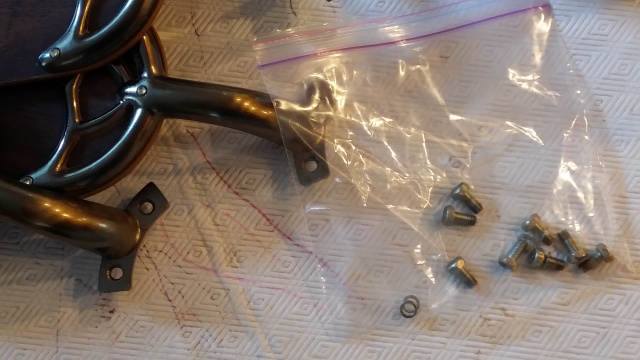
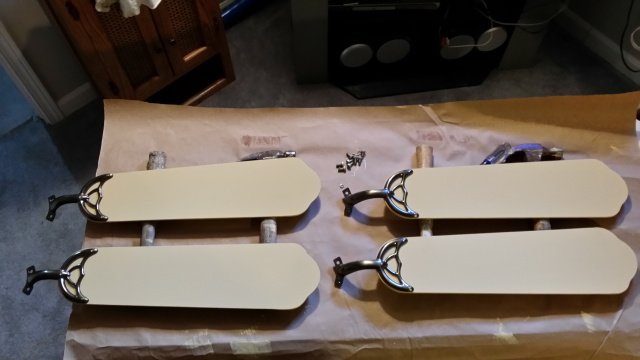
Grab a ziplock style sandwich bag or closeable container to store all of the screws you remove during this process. Not all screws will be the same shape and size so be sure to either remember where each one goes or lable them accordingly.
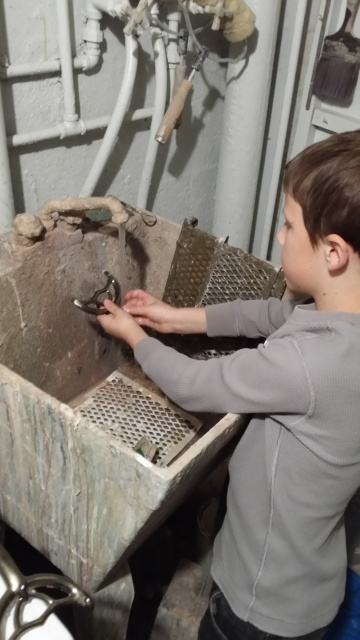
Now is a perfect time to clean the built up dust on your brackets. Put your brackets under warm water and give them a cleaning so they will be nice and new looking when reattached to the fan blades.
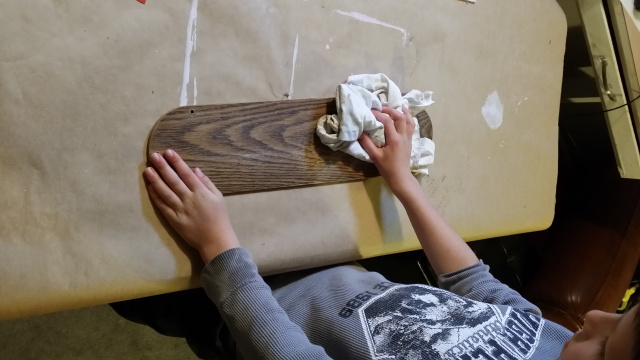
Now its time to prepare the surfaces for paint. Wow, a whole lot of dust right?! First dust the blades with a standard house rag.
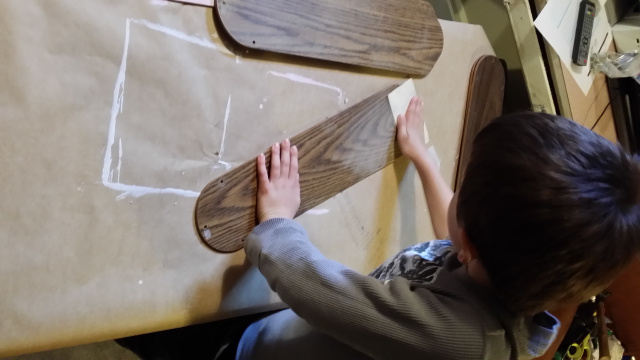
Next, sand the blades with a light grit sandpaper, somewhere at or between the ranges of 150-220 (any local hardware store will have this sandpaper available). These fan blades are really smooth already so we want to use a sandpaper that won't scratch the surface too much, just good enough so the primer used adheres well.
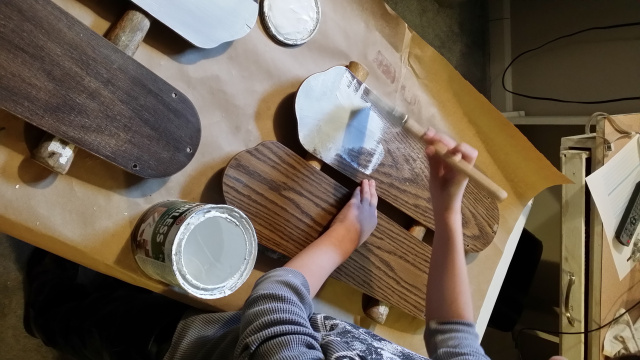
Now that we have sanded the ceiling fan blades we want to wipe them down clean. Use the same standard house rag to wipe them first and second wipe them down with a "tack cloth". Tack clothes are amazing sticky little rags that attract all the little particles that a standard house rag cannot attract. Now we are ready to prime our ceiling fan blades! For this project I used an odorless oil-based primer primarily because I had it laying around. This is the most ideal primer because oil-based primers have greater tendencies to cover wood stains. However, for this project I think a good "all-purpose" water-based primer would work great as well and water-based primers clean up easy. If you have any questions about which primer you should use leave a comment or send me an email and I will guide you to the right product.
Now, prime one side of the blades, allow to dry then flip over and prime the other side. Don't forget to prime the edge of the blade too! Once, the primer is completely dry repeat the surface preparation process. Sand the blades lightly, wipe them down with the house rag, and give them one more wipe down with your tack cloth.
Now it is time to put some paint on our ceiling fans! I chose to use the same color for the fan blades that I have on my walls in my living room (the room the fan resides in). We will be using the same process for applying the paint as we did for the primer. Paint one side of the blades and the edges and allow to dry. Once the first side is dry flip the blades over carefully and paint the other side (this process should be repeated one more time to give two coats of paint per fan blade).
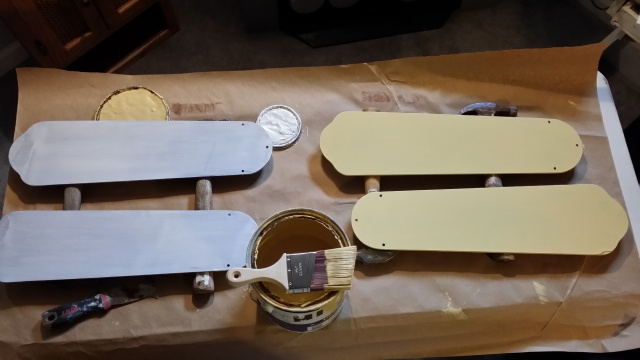
Painting fan blades isn't as easy as it looks so don't be discouraged if you are having issues with the blades sliding around while you are priming and painting them. I placed my fan blades on a bunch of hammers I had laying around and I used a tool called a "5 in 1" to hold the blades off the hammers a little bit so I could apply paint to the surface without the blade sliding around.
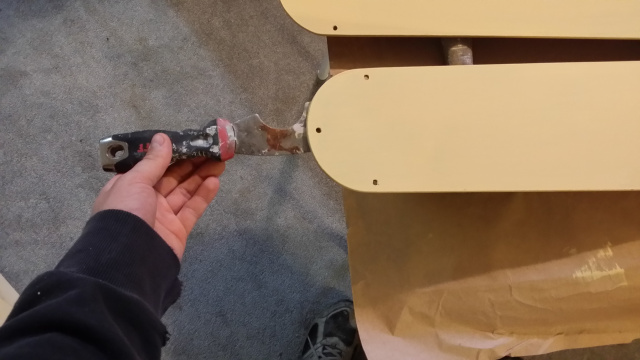
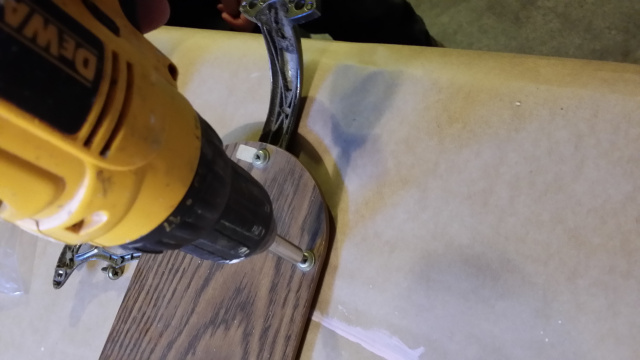
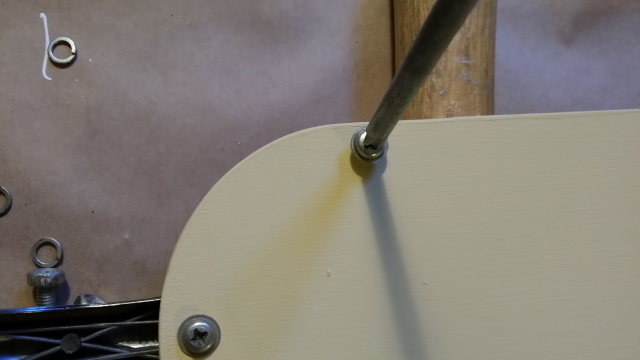
Now that the fan blades are dry it is time to reattach the screws. I used a standard phillips head screwdriver because I didn't want to apply too much pressure and potentially damage the blade. You will also have a better "feel" for how tight the screw needs to be.
Here we have two brackets on and two more to go!
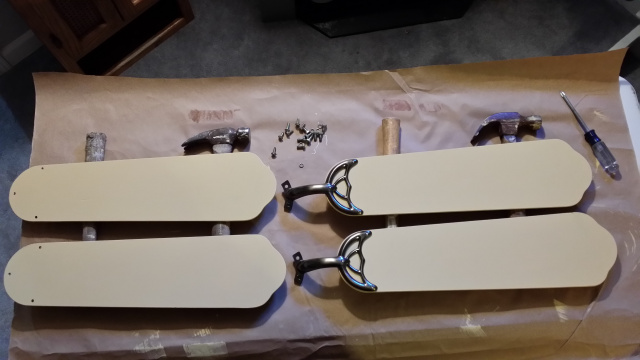
And finally! All brackets are reattached and the ceiling fan blades are ready to be attached to the ceiling fan.
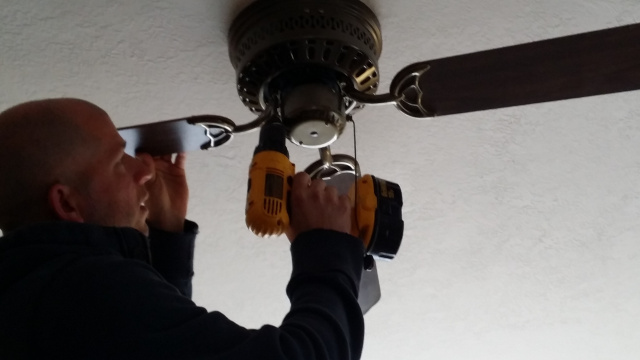
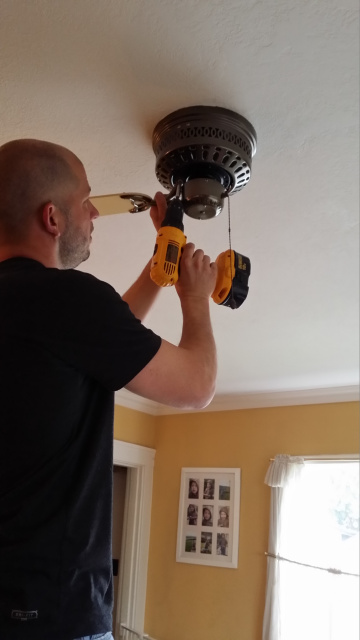
I used the drill/driver to reattach the brackets to the ceiling fan. The drill driver is more useful than a regular screwdriver in this situation
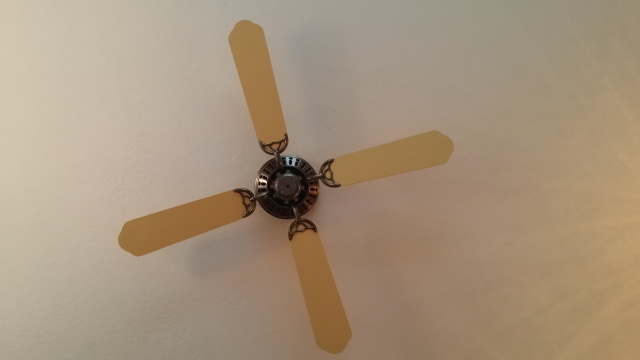
And we are done!
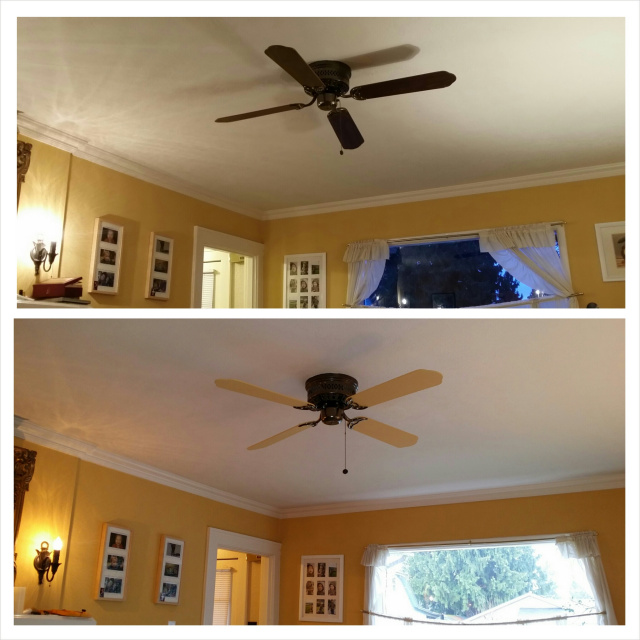
This DIY project brings a little more life/fun to our living room space. Keep in mind the colors are limitless. Imagine a shiny bold red to match the throw pillows on your couch....A piano black to match all the picture frames and the large HDTV in your living room. I chose the color for my ceiling fan blades to match my walls (paint name "Devine Straw") because it brings me feelings of fun/playful/youth and it matches my messy house full of toys well. Choose your color wisely....or not....because you can always change it again, now you've got the How-To!
List of Items needed: Sandpaper 150-220 grit, house rag, tack cloth, primer, paint, paintbrush, screwdriver, drill/driver, sandwich bag or storage container