

Hello Everyone!
Lately, I have been very busy with our commercial and residential paint projects at Gene Darco Painting. I did, however, find some time to do a quick 1 day project for my mother for Mother's Day. It all started with a picnic table that my grannfather Eugene Darco built for our family. The picnic table has been stained and then painted over the years to help it keep a nice appearence. However, over the many years in the direct rain and sunlight the table has taken quite a "beating". For Mother's Day I thought to myself, "what better present to give my Mom than to fix the table she has had for so many years?" I managed to snap a couple photos of the project along the way, so follow along as we bring back to life our family picnic table!
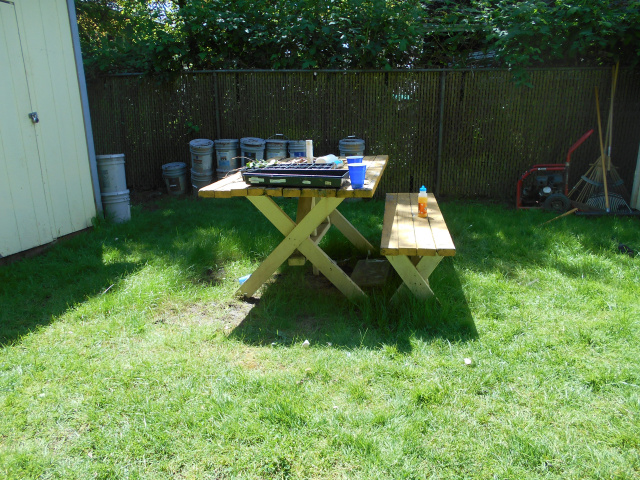
I start off with a picnic table with benches that have their base painted a light cream color and the top boards are an orangeish color. The boards along the benches are in fairly good condition, however, the boards atop the table are in very rough shape, including a lot of dry rot.
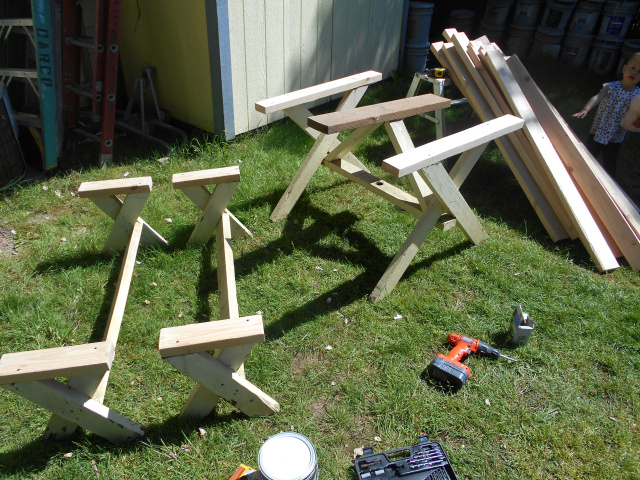
I took a small sledgehammer and knocked out all the boards from the table and benches. I decided to keep the bases because they are in good shape and it will help speed up the total time for the project.
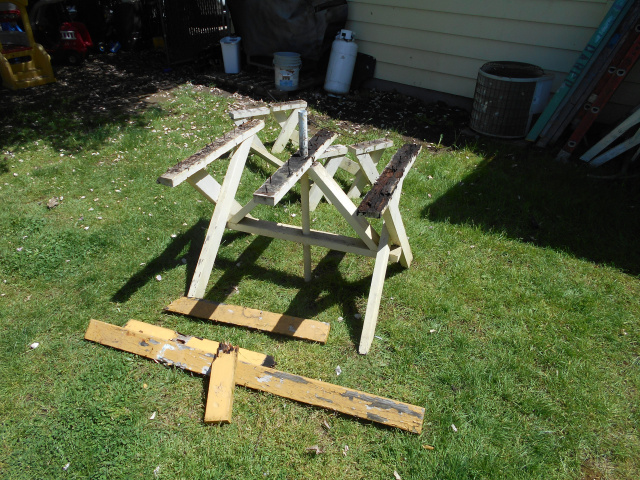
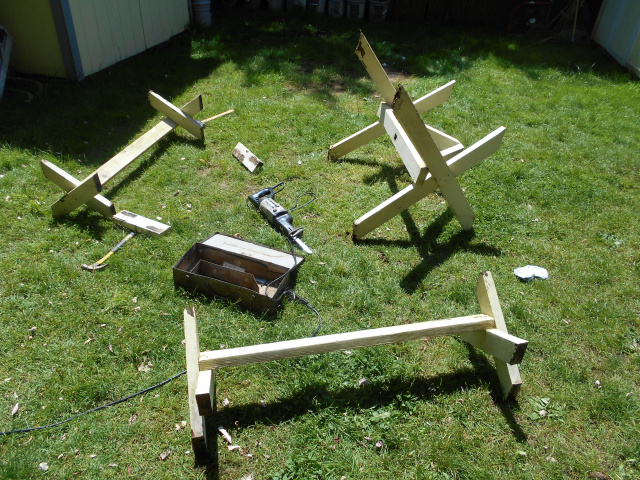
Below is a picture of the bases for the benches and the table. Some of the nails and screws were still present after pounding off the boards so I had to use a "sawzall" with a metal blade to saw them off flush with the wood so I can screw the knew boards on.
Here I bring in the 2 x 4's that I am going to use for the project. I pre-cut all of the wood the same size as the existing wood, which made it rather easy. (Helpful Hint: measure out all of the wood BEFORE you head to the store to purchase it. I was able to save money by buying the lengths of 2 x 4's that I needed. 2 x 4's come in different lengths, 8ft, 10ft, 12ft, etc. I saved money by purchasing the 10ft. boards and utilizing all the wood the best way possible to minimize scrap wood).
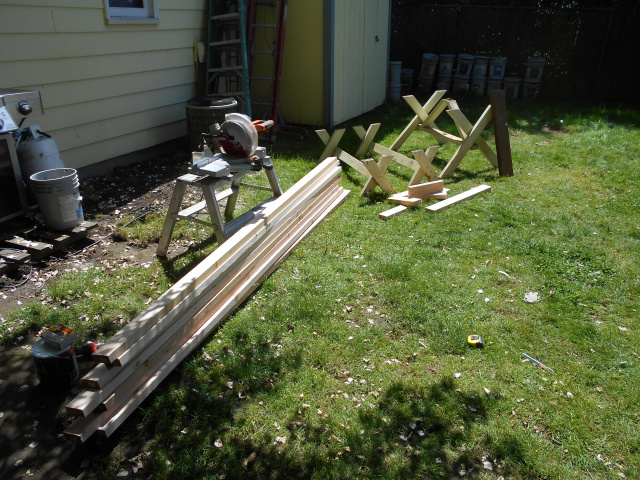
I precut all my wood the exact size of the exisiting pieces (5ft. length) that were damaged and I removed. Here I attached the pieces with a screw gun and rust resistant screws that my finished boards will rest atop.
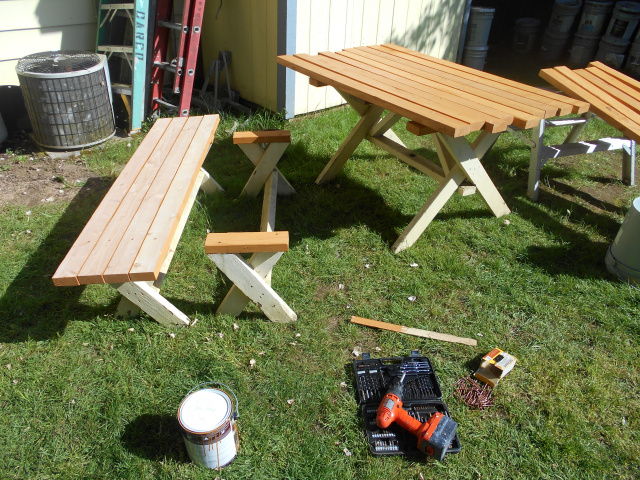
The next step is very important! Pre-stain all of your pieces BEFORE you screw them down! For this step you have to have a lot of space available to work with. As you can see in the photo I used the benches, the table, a ladder and buckets to hold the pieces once I stained them. The trick here is to stain "5 sides" of the wood leaving one side left to stain.
Many times when you buy lumber you will have a side that has imformation printed on it identifying the piece of wood or you will have an "ugly" side. You want to stain that side of the 2 x 4 FIRST saving your "beautiful" side for last because that is the side we want to "showcase" on our benches and our table. Now, allow the stain to dry. It may take an hour or a day depending on what type of stain you bought. For this project I used a water based stain from Home Depot that dries in an hour if the proper conditions are met.

In this picture you can see that we screwed the "ugly" side down so we have the "beautiful" side up. This trick will make the difference between a good looking table and a beautiful table! Don't just screw the boards down! Pre-drill a hole where each board is to be screwed down. These pre-drilled holes should be just smaller than the size of the screw. By doing this you are helping the longevity of the picnic table. Drilling into 2 x 4's without pre-drilling the holes can cause the would to "split" where it can take on water and "break down" quicker. 2 x 4's may natuarlly split over time, but we want to avoid any cracks in the 2 x 4's that we can.
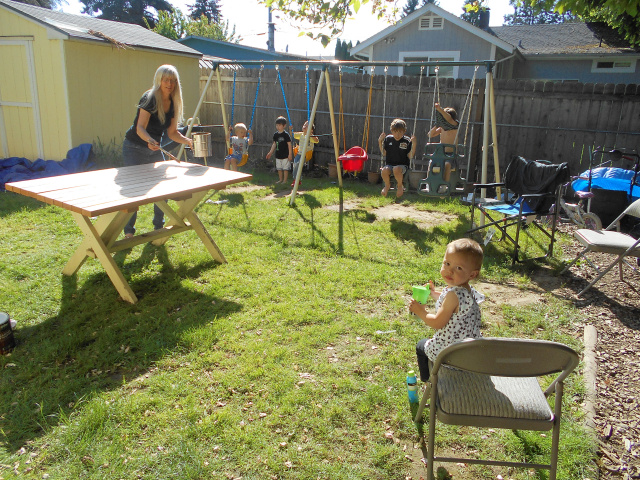
Now, I told you it was Mother's Day when I did this and that is true, but that didn't stop my Mom from making her impact on her very own gift from me, her son. After I pre-drilled and screwed the boards down she applied the top coat while her grandsons looked on from the swingset and her grandaughter watched from the chair!
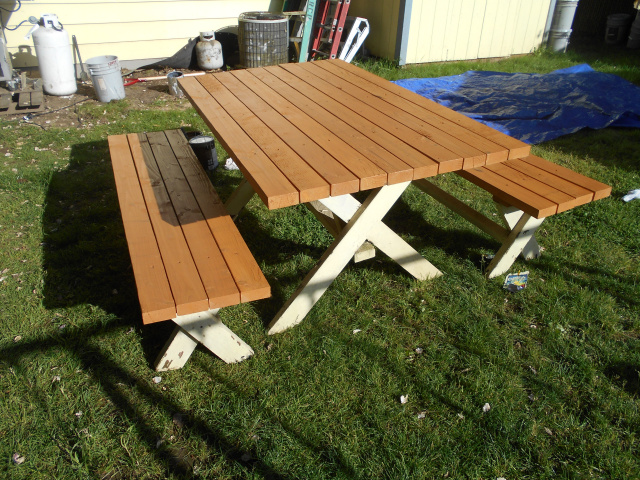
Staining after the boards are screwed down helps "seal" the top of the table from water penetrating through the points where we screwed the boards. Apply a second coat after the recommended wait time labled on the can. For the product I used the wait time was 4 hours so I opted for the following morning. Here is a picture of the final product!
I hope you enjoyed reading about the project!
List of Items needed: (10) 10ft. 2 x 4's, 1 box of deck screws, 1 gallon water based Behr Ultra Premium Cedar Stain, Paint Brush, Chop Saw, Sawzawl w/ metal blade, Drill, Drillbit, sledgehammer, Mom!