

Hello Everyone,
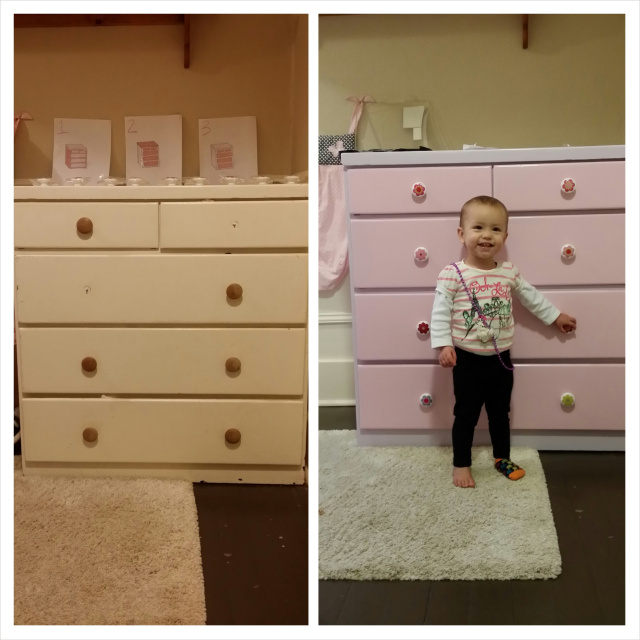
I would like to share with you a recent project of mine, repainting a chest of drawers. This dresser has sentimental value because it was made by my grandfather for my dad. It has been used by each of my 5 siblings at one time or another and finally made its way into my daughters room. Now, it is time to give this chest of drawers a make-over.
1. Start with a sketch and color scheme: 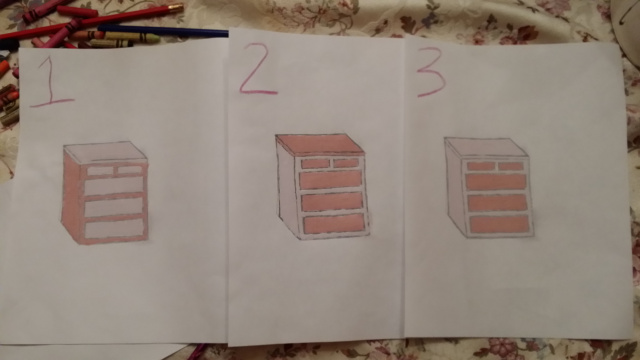
I came up with three options. I sketched the dresser, photo copied it twice, and painted the copies with the paint I was going to use (you can also use colored pencils if you don't have the paint yet). Which one will you choose? Ask for advice from your friends and family if you would like. I chose to go with option number 3.
2. Get your paint. There are 2 different types of paint you can use, an oil-based paint or a water-based latex paint. I chose to go with an oil-based paint because it is more durable and the previous finish was an oil-based paint (keep in mind oil-based paints clean up with mineral spirits while water-based paints clean up with warm water). You may elect to use a water-based paint if the furniture is brand new and unfinished. If you choose to paint brand new unfinished furniture just don't forget to "prime" first! Now is the time to choose the "sheen" of the paint you will be using. Would you prefer Satin, Semi-gloss, or Gloss? I chose a satin finish because I prefer a lower lustre.
3. Make adequate space. You will find yourself frustrated if you do not have the proper space while working on your dresser. Take into account that you will be removing all of the drawers. You will need space to do your preparation work and painting to have a successful project.
4. Preparation.
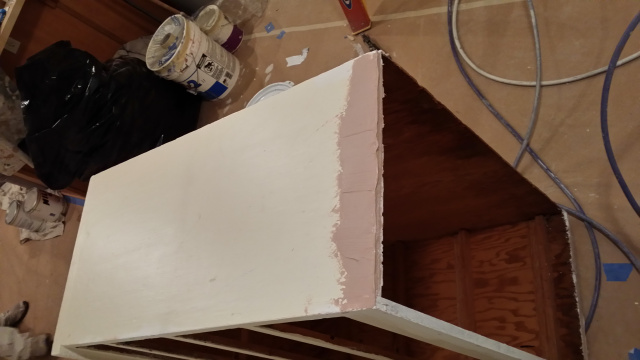
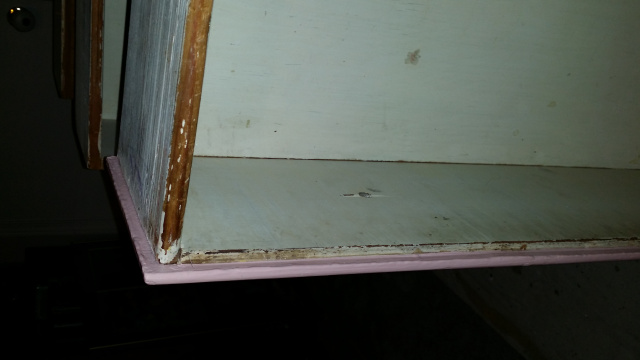
This Chest of drawers had significant damage at its base. A good way to fix such damage is with bondo. This is a product that you can find in any home improvement or auto store. Bondo is a two-part process where you mix the "base" and the "hardener." Mix the bondo as per the instructions on the label and apply with a 6" putty knife.
After you the bondo dries you will need to sand it smooth. I used an orbital sander with attached dust filter. Once smooth, apply a light coat of "spackle" to fill all other imperfections and allow to dry. Once the spackle has dried you can sand it smooth with a 220 grit sandpaper.
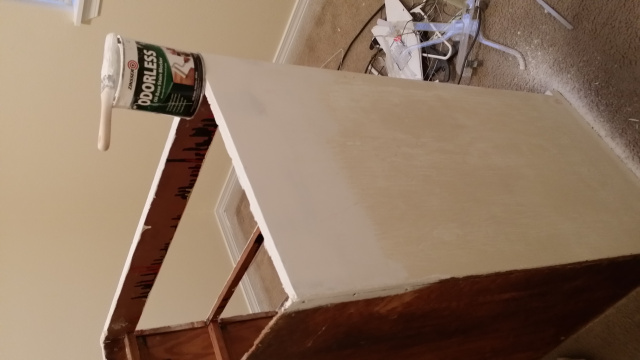
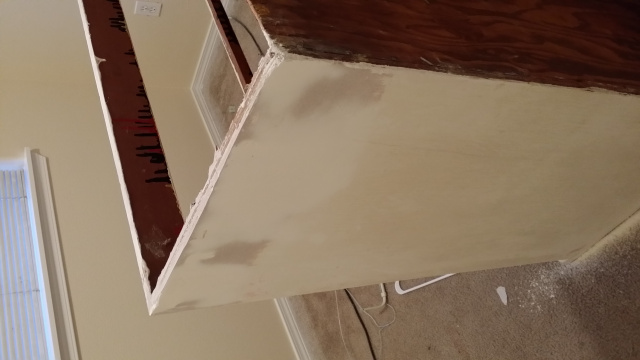
The next step is to prime any remaining smooth patches or bare wood spots to improve adhesion and sheen consistency of the paint. I used an odorless oil-based primer. Once the primer has dried make sure everything has been sanded with a fine grain sandpaper (I would recommend 220 grit). You want to avoid using very gritty sandpapers because they may cause scratches in your furniture! After everything is sanded wipe down the dresser with a "tack cloth". This is a cloth that is sticky so it picks up all the little dust particles to ensure a smooth finish once you paint.
5. You've made it this far now it's time for paint!
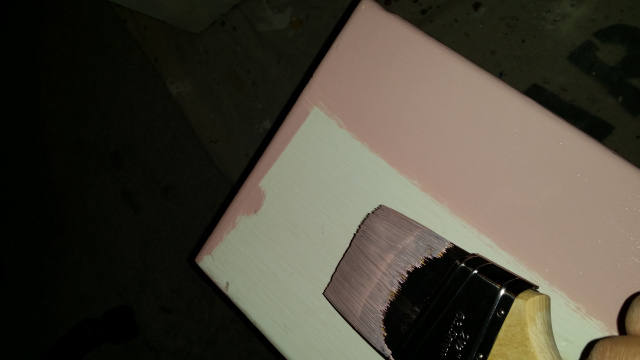
Apply an even coat of paint to the drawers. Once an even coat of paint has been applied make a full paint stroke from one end of the piece to the other end to avoid any "runs" in the paint.
When painting the drawers dont forget to paint the "lip" of the drawer. It will help avoid paint chipping over time from wear and tear.
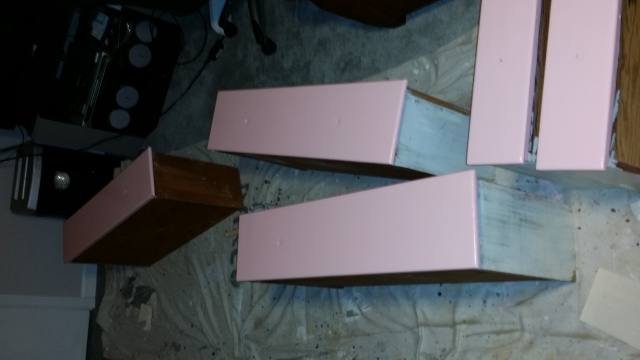
Once again make sure you have adequate work space. Take your time and your work will show.
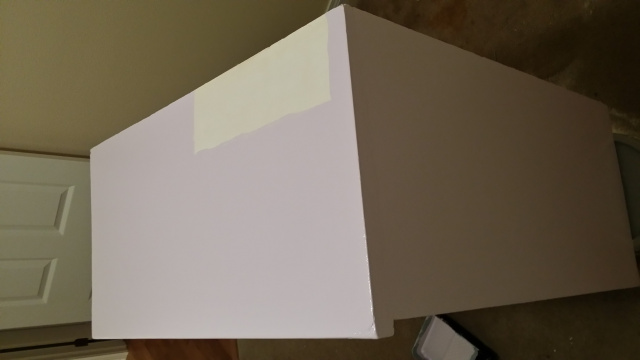
Now that the drawers are complete, lets paint the dresser. When painting the dresser you don't have to brush the whole thing. Get a small paint tray as well as a "foam" roller and apply the paint liberally. Just make sure once you completely paint a section to go over it with even strokes with a paint brush from once end of the piece to the other end. This tachnique is called "tipping off" or "laying off".
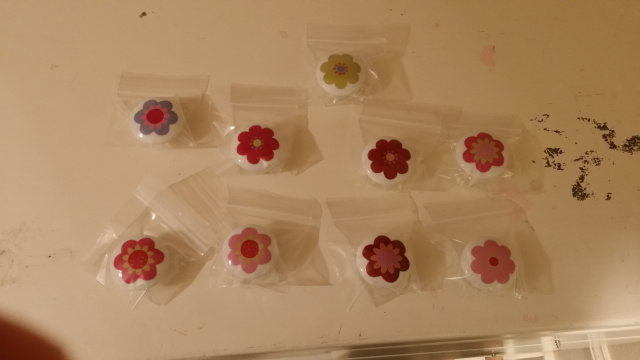
6. Get some knobs! Perhaps the most fun part of the job. I chose these knobs I found on amazon.com
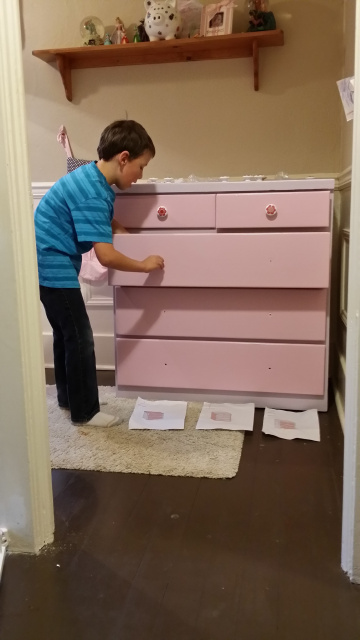
7. Finally attach the knobs but don't tighten them too tight! Just tighten them enough to make the dresser functional and give the paint some time to cure. Giving the paint a few days to harden will prevent the knobs from sticking to the fresh paint. After a few days you may tighten the knobs. I suggest contracting this part of the job out. I taught my son how to use a screwdriver and install the knobs.
If everything goes well you should have a good looking chest of drawers and a happy recipient!
List of Items Needed:
Bondo*, Patching*, 6" putty knife*, Sandpaper (220), Tack Cloth, Primer, Paint, Rags, Knobs, Workspace.
*items may not be needed for your project